You will be asked for your UC login.
For PC users:
To install EndNote 20, double click on the EndNote20.exe file downloaded from the above link. Extract this file file onto your desktop by clicking on the the three ... and selecting your Desktop. This will create two new files, EN20Inst.msi and License.dat. Double click on EN20Inst.msi to start the install. The license.dat file must be present in the same folder.
The Library provides some modified and additional Filters and Styles.
Note that any zipped files need to be 'unzipped' i.e. right-click and choose the extract command. Copy these files to your EndNote file folder location.
If you just need the APA 7th style, note that this is not 'zipped'. Just save it into your styles folder.
C:/Progam Files (x86)/EndNote 20/Styles
Download:
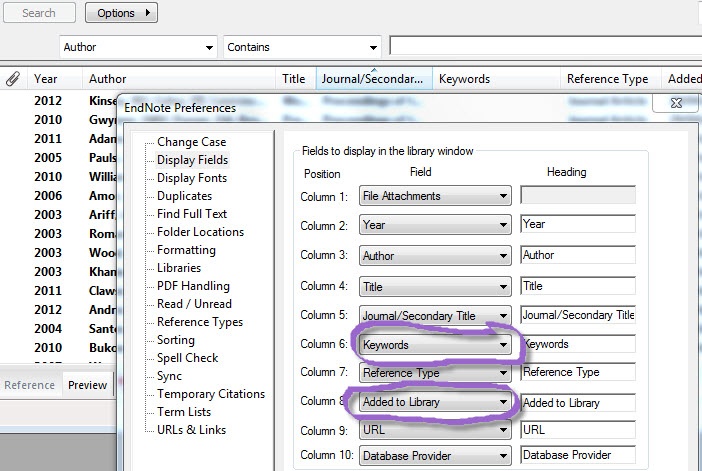
You can change how the fields are displayed in your EndNote library to emphasise the fields that are important to you. This can be useful if your library becomes very large.
To change the fields you can also drag and drop the headings to the place you want them to be
