Skip to Main Content

Library Subject Guides

4. Writing up your Research: Thesis Formatting (MS Word)

Haere mai, tauti mai—welcome! These instructions are designed to be used with recent versions of MS Word. Please note there is no template or specific formatting guidelines for a thesis at UC. Please talk to your supervisor and take a look at theses in the UC Research Repository to see how they are usually formatted.

Word Thesis Formatting workshops run throughout the year.

Some Useful Documents

For more APA formatting advice see the APA Style Blog's excellent Style and Grammar Guidelines.

Finding Examples

Look at examples and ask your supervisor.

The best guide on how to format your thesis is a combination of:

  • Looking at previous theses in your discipline. Search the UC Research Repository for your subject or department, and browse by issue date to get the most recent.
  • Asking your supervisor for recommendations on specific formatting and details. 

General Recommendations

The following is an example only of preliminaries to the thesis that could be included.

  • Title page
  • Abstract
  • Acknowledgements
  • Table of Contents
  • List of Figures
  • List of Tables
  • Abbreviations
  • Glossary
  1. Toggle show Home ->Show/Hide formatting

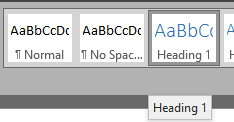
Using styles for headings allows you to create an automatic table of contents.

  1. Select major headings one at a time and choose Home ->Styles ‘Heading 1’

  1. Select subheadings and apply Home ->Styles ‘heading 2’ and ‘heading 3’
  2. Modify a style by right clicking on it and choosing Modify in the styles pane at the top of the screen.


The Navigation Pain is useful for seeing the outline of your document as well as providing links to quickly go to any section of the document.

  1. View->check Navigation Pane

In order to create an automatic table of contents heading styles must be used.

  1. References -> Table of Contents -> Custom Table of Contents (no heading in table)

  1. Right click table of contents to ‘update field’ and choose ‘update entire table’


  1. Home->Multilevel list-> choose style with a number level for each heading level


  1. To change the heading level 1 number to say ‘Chapter 1’ right click on heading level 1 in the styles area Heading 1->Modify.

  1. In the modify screen click Format->Numbering.

  1. Then click ‘Define New Number Format’.

  1. Then add the word ‘Chapter’ and a space before the ‘1’.


To create automatic lists of figures or tables you first have to give a caption to all your figures and tables.

  1. Right click figure or table and select Insert Caption

  1. Choose Label type eg. Figure, Table etc
  2. Choose position above or below
  3. Give the table or figure a title in the top box
  4. Click OK
  5. Go to the headings for List of Figures and List of tables and then click References->Insert Table of Figures-> select caption label type (Figure or Table)


  1. On the following menu select caption label type (Figure or Table) and click OK

This can be used to have different page numbering styles of different sections of your document or to have certain pages landscape to display a large table or graph.

  1. Insert a section break (next page) at the end of the title page (Layout -> Breaks -> Next Page)

  1. Insert a section break at chapter 1 (Layout -> Breaks -> Next Page)
  2. Insert page breaks for all other ‘heading 1’ headings (Layout -> Breaks -> Page)


Adding Page Numbers

  1. Insert -> Page Number and choose a position on the page

  1. Double click on title page header or footer (top or bottom of the page) and tick ‘Different First Page’ in the Design ribbon that appears

  1. Click in second page header or footer, right click on the page number and select ‘format page numbers

  1. Select Roman numerals eg. ‘i, ii, iii, iv’ etc
  2. Select start at ‘i’ (start at ‘1’)

  1. Scroll to chapter 1 and change number style for this section back to ordinary numbers and start at 1


Change Page Orientation

  1. Insert a section break before and after the pages you want to change to landscape orientation (See instructions above for inserting a section break)
  2. Layout -> Orientation -> Landscape

NOTE:  A section break is usually only needed if page orientation or separate page numbers are required.

Who to Contact